Thursday, June 26, 2014

Thrifty Thursday: A Country Chic Tunic

As I've mentioned before, I am a mom on a budget . . . so I just love 69 cent Saturdays at our local thrift store. I go in and buy whatever I think might be able to be turned into something new again! I love trying to see the good in things. So when I saw this too tiny tunic for 69 cents I snatched it up.


It was way too tight and a kind of boring but I loved the red print and let's face it, a button up top can be a nursing mom's best friend! So out came the seam ripper and away went the sleeves because it's hot out and I need clothes to wear right now. I also picked out the darts on the back and cut some slits where they existed because I had to make this bad boy fit.


I ran my new raw edges through the serger to keep things easier to work with.


Then my new armholes got hemmed.


My top then got put back on the dress form so that I could pin my slits into position to figure how much fabric I would need to add to my top to loosen it up.


These new slits definitely loosened up the shirt but also left it sitting a little funny on the form. So I added some darts that ran perpendicular to the new slits. 


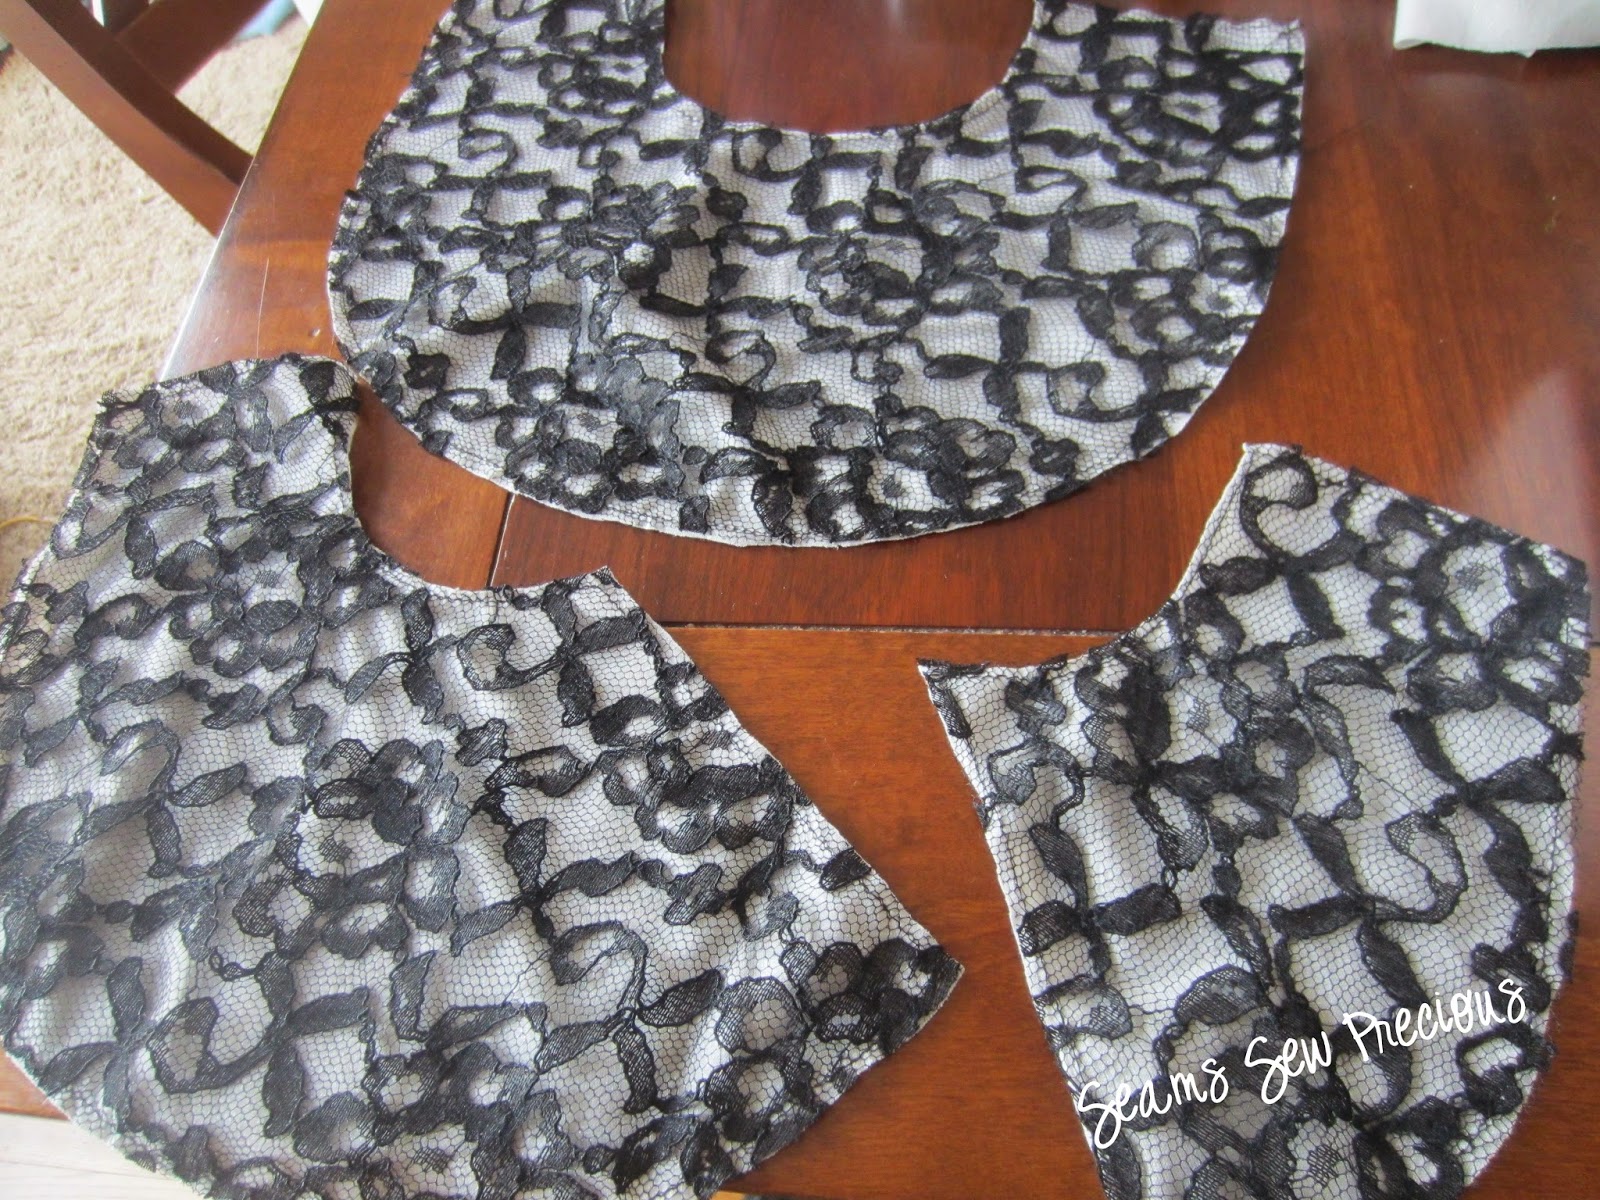
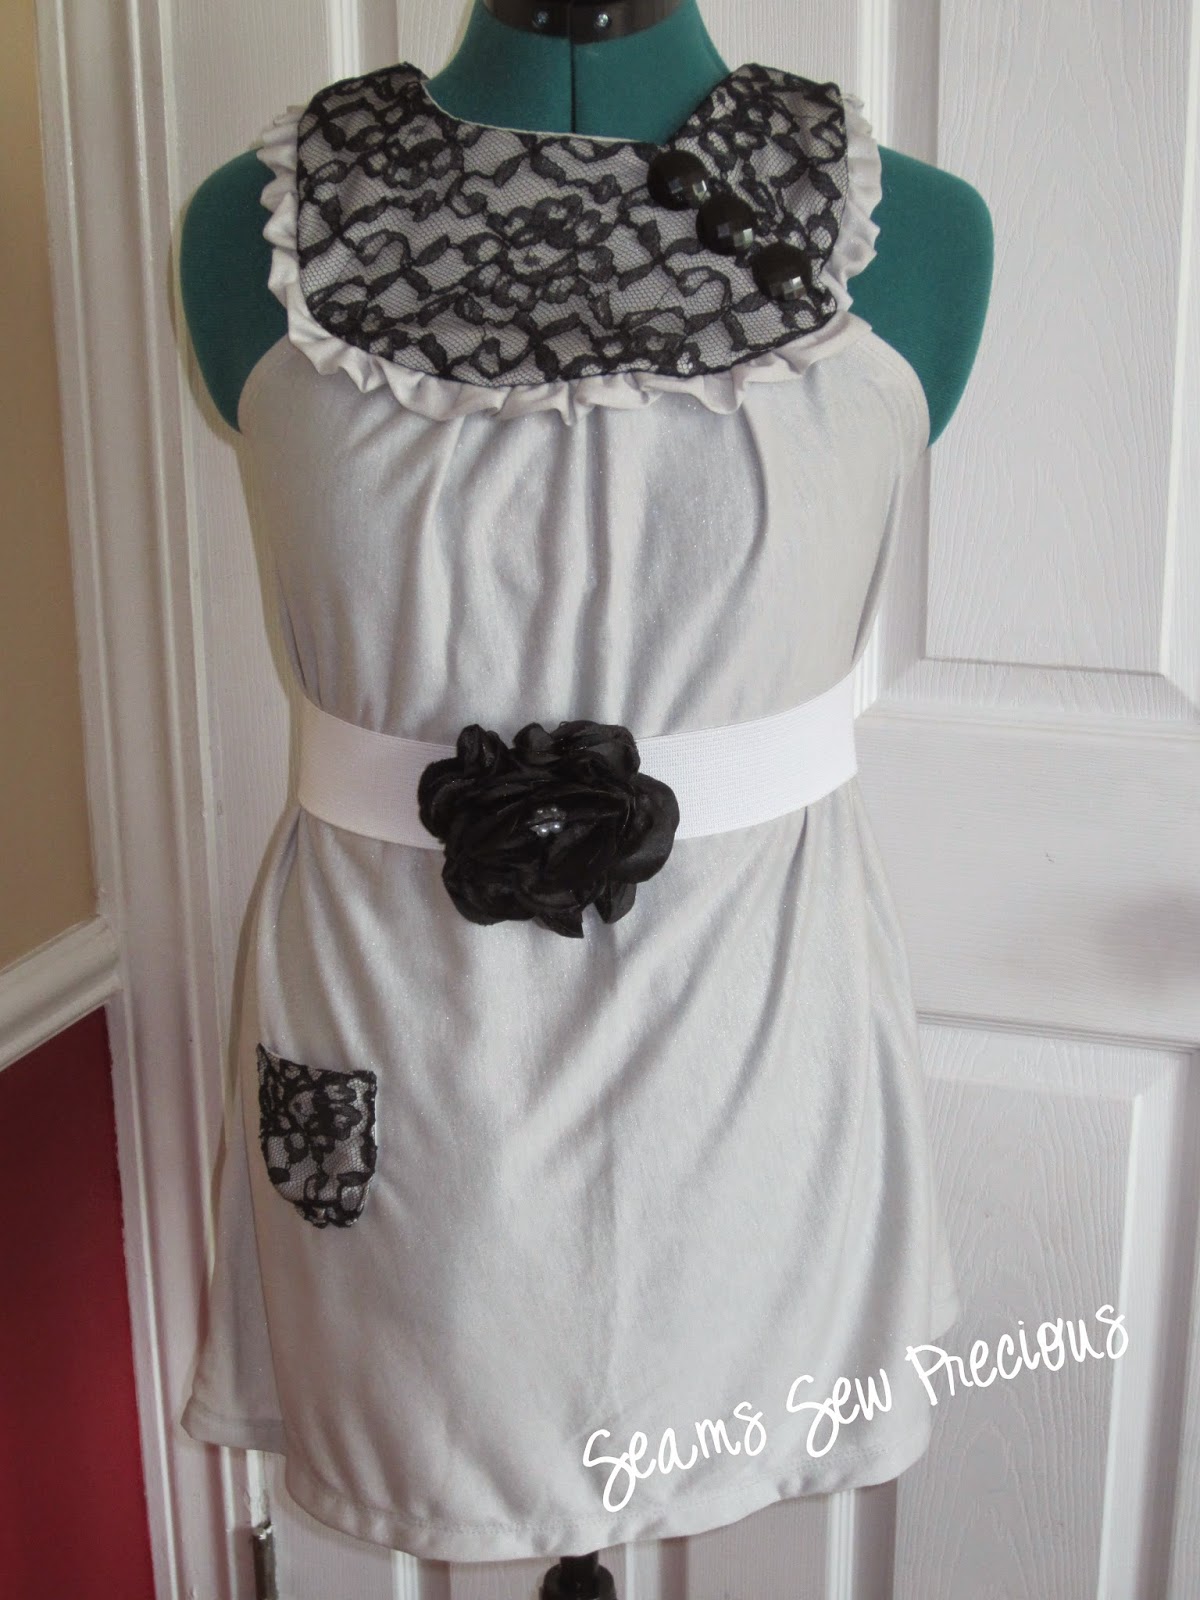
I then had to find a fabric to dress this shirt up with and I had just the thing. A thrifted lace valance proved to be just what I needed to add a pop of wow to this tunic. 


Seriously, doesn't it just add a rustic romance to this shirt?


I loved the pop of lace so much that I decided to add a bit of it to the armholes as well. 


Finally I had to remove part of the darts in the front of the shirt. Why, you might ask? Because my child bearing hips needed room to breath! So once again I picked away with the seam ripper but this time only up to the waist. A quick stitch with the sewing machine ensured that the rest of the darts did not come unraveled with wear and tear. 


And with that, I had a new old top that is perfect for summer and nursing! 


I just love finding the good in things!


Until next time . . . happy sewing!

Wednesday, June 25, 2014

Mom Needs a Bib Too: The Ruffled Bib Tunic


I have been living in capri leggings and tunic tops ever since delivering my daughter last month. It's just what works for now. Unfortunately though, I only have about 3 tunics and I don't feel like washing laundry every 3rd day! So I pulled one of my favorite tunics from my closet and decided to try my hand at drafting a pattern.


I only had to draft a pattern for the bib of the shirt. Yes, I drafted this pattern on notebook paper. Again, it is what I had and it works for now. I cut rectangles for the bottom and cut two corners off for the arm holes. 


I cut my pattern pieces out of some jersey knit fabric and also out of some black lace that I basted on top of my pieces.


I then sewed the bib together at the shoulder seams.


Now my bib needed the ruffle detailing added. I cut some strips of jersey knit, folded them over and ruffled them up. I then basted them to the front of the bib.


I also took my rectangles and hemmed the corners that had been cut off. 


Then came the very tricky part. Figuring out how to assemble everything. It took a lot of trial and error, which meant that after a few rounds with the seam ripper I had completely forgotten about the camera! But I basically had to baste the rectangles down onto the bib, tuck them up nice and small, and sandwich them between the right side of the bib and the right side of the bib lining. The bib got sewn up minus a nice 4 inch hole and everything got turned right side out. I was so relieved to find that it worked. Then I just had to sew the bib overlap in place and accent with buttons and a cute little pocket!


I am so happy with how it turned out! I may have to make another just to be sure I have the process perfected. 


Until next time . . . happy sewing! 

Friday, June 20, 2014

A Tote Fit For Tiffany's


I have a love of old movies and one of my favorites that I indulge in over and over again is "Breakfast at Tiffany's"! Audrey Hepburn's classy style is one that I continually try to mimic so when I stumbled upon a picture of a beautiful tote bag with her iconic image on it I just knew that I had to try to create one of my own. Of course, I had stumbled on this image well over a year ago and no longer knew where to find it (I am so far behind in my list of things I would love to accomplish). But I never could forget what it looked like and so I set off to create one of my own during the last few weeks of my pregnancy. 


I chose a few of my very favorite fabrics (you know, the ones that get stashed away for future projects but never get cut into because you can't bear to use them up). Since this needed so few of each I finally saw the opportunity to cut into those beautiful pieces. I pieced some strips together for both the front and the back of my bag. 


And then I sketched out my image of Audrey and began hand appliqueing her into place. 


She was finally starting to look like Holly Golightly but she still needed more!


And so I pulled out the embroidery hoop and got to work adding details, including her pearl jewelry. 


Once she looked like Holly I was able to finish piecing the front of the bag. 


Once I hit this point the bag came together quickly. I added some straight line quilting and straps and I was ready to add some thick stabilizer (to help the bag hold a nice shape). 


I sewed up the sides and added a lining and the bag was ready to wear out. Of course, for now I am sporting a diaper bag but I will have a great tote to take out at some point! 


It was good to be back behind the sewing machine this week. I hope to keep trying to make progress on some other projects I have going but obviously my sewing time has been much shorter as we transition to life with another little one! As much as I love sewing, I love cuddling my little peanut so much more! 

Until next time . . . happy sewing!