Tuesday, June 18, 2013

Thrifty Find: Quilt Rack

I got to go out thrifting with my mom and aunt yesterday. Lately I haven't been having much luck with sewing/quilting supplies so I was completely prepared for just finding the usual home decor items and unique clothes. I was pleasantly surprised as I approached the back of the second store we visited. Sitting upside down was a broken piece of furniture that appeared to be a quilt rack. Sure enough, it was and it was quite pretty, even with pieces dangling.

I wish I would have taken a before picture but it wouldn't even stand up on it's own. Last night I grabbed a screw driver and wood glue. I took almost the entire rack apart, reinforced areas with glue and properly tightened everything up. When I woke up this morning I found a perfectly stable, beautiful quilt rack just waiting to hold some quilts!


All it needs now is a round finial on the bottom left (one was missing) and some stain touch up on the top 4 corners. It was just a little damaged from being kept upside down at the thrift shop. 


Not bad for $20 and just 30 minutes of work. Especially considering that I found this rack online at Sears for $50! I am quite happy with this thrifty find . . . I can't wait to finish up some new quilts to hang on it!

Happy Quilting!

Monday, June 17, 2013

My New Best Friend: A Needle Minder

As I began my journey into hand quilting I discovered one huge problem . . . I was wasting so much time searching for lost needles between thread changes. It was amazing how quickly I could lose the needles despite telling myself that I would keep placing it down in the same spot. A few weeks into hand quilting I saw an advertisement in a magazine for a needle minder . . . BRILLIANT! But when I looked the brand up online it was $12 for a flat piece of magnetized metal formed into a shape. While the shapes were a cute idea none of them were my style.

I decided to search eBay to see if there were better options when I stumbled upon greenjewelry4u on eBay. It is an eBay shop full of the most beautiful needle minders and scissor fobs, and for nearly half the cost of the big metal stamped needle minders! I found myself struggling to choose between all of the stunning options. I must warn you, one is just not enough . . . at least not if you like to accessorize. I placed a few orders over the next week or so and I was absolutely delighted when the products arrived.

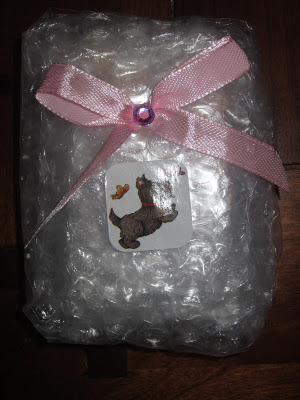
Not only was the shipping quick, but the items were beautifully packaged.


The package within the package was beautiful as well.


And the items themselves were even prettier than the pictures let on!


Even better than all of this, the magnets! Oh the magnets! These magnets had me worried when I first opened them . . . they were so petite. But oh my! The strength! These magnets had no problem holding strong through the 3 layers of my quilt and even better yet, the magnets did not mark my fabric! These needle minders are just perfect and just so beautiful to look at!

But that is not even the half of the fabulous encounter that I had using greenjewelry4u. Upon contacting greenjewelry4u regarding a scissor fob that had sold out, I discovered that she also does custom orders. I placed an order by simply explaining how much I love Dachshund embellished accessories and wouldn't you know it . . . she delivered with a beautiful set for a doxie lover! 


Once again, it was beautifully packaged.


And as I said, she certainly delivered on a beautiful set, a scissor fob and needle minder perfect for using as I sew beside my own Doxie pup!


I know they are just stunning but the true value of these accessories is the time that they save me when I hand quilt. Knowing where my needle is every time I put it down on my work is a priceless perk, saving me countless minutes of searching. And being able to see my scissor fob glistening in the small basket of accessories next to me helps me grab my scissors in a split second for snipping threads. 


Plus there is nothing better than looking down at something beautiful while you are spending countless hours sewing a quilt! If you don't have a needle minder already, I highly suggest you get one as soon as possible. And I highly recommend heading over to greenjewelry4u on eBay for an affordable yet stunningly beautiful option. After all, there's nothing better than supporting someone who handcrafts while you are hand crafting! 

Happy Quilting!

Sunday, June 16, 2013

Adventures in Hand Quilting

It all started three and a half months ago after watching the movie "Lincoln" with my dad (a huge civil war buff). An idea was planted in my head to create a civil war themed quilt for the man who spent many hours reading countless books about Lincoln and the Civil War. I knew it would be the perfect father's day gift for him. I began doing some internet searches on Civil War quilts and stumbled on Barbara Brackman's website, http://civilwarquilts.blogspot.com/. Next thing I knew I was at our local library checking out her book, "Barbara Brackman's Civil War Sampler: 50 Quilt Blocks with Stories from History". I chose the blocks I liked best and got to work.

As I finished piecing the top of the quilt (all on a treadle machine) I realized that it was quite busy with the assortment of blocks and I needed to quilt it in a way that would tie everything together. So I decided that rather than stippling on the machine I would prefer to do a repeating fan pattern. And then it hit me that these should be hand quilted, perhaps the way it would have been done at that time. 

I had never hand quilted before, so once again I was back on the internet. I watched many videos and read a few blog posts and ordered the few things I would need for hand quilting. 

Small quilting needles: I used John James Quilting Needles, Size 9 (which I ordered from Missouri Star Quilt Co.)

A Good Thimble: I use Singer's Comfort Fit Gel Thimble (I found mine at JoAnn Fabrics and wear it on my middle finger)

A Quilt Hoop or Quilt Frame: I found I switched around depending on how I wanted to sit. Honestly, I love the hoop because then I can work wherever I want. 

Small Quilt Hoop - Thrift Store for $1.99


Quilt Frame my Husband Built for $30 in Supplies

Optional Item: A Rubber Thimble for Added Grip (I purchased one from Missori Star Quilt Co. that I wear on my pointer finger)

Finally, I was ready to practice. Practice was definitely key. I took some scrap fabric and scrap batting and created a sandwich just like the actual quilt and practiced until I felt comfortable with the movements. Then it was time to tackle the quilt. For anyone learning, I do prefer step by step photos so I have included the motions that work for me. 

Step 1: Create your quilters knot and pull it through your sandwich to begin. Keep one hand above and one hand below your quilt. Then push your needle through your quilt going straight down. Do not push all the way through . . . stop once you feel the needle catch on your finger below the quilt.


Step 2: With the back of your needle nestled into a dimple on the thimble, turn the needle nearly 90 degrees, becoming almost parallel with your quilt and push through all layers bringing the needle back to the top. Use your thumb to add resistance to the top of the quilt to aid the needle in pushing through easier. Once again, push just the tip of the needle through.


Step 3: Keeping the needle nestled in a dimple on the thimble, pull the needle back up 90 degrees so that it is once again pushing straight down into the quilt. As before, only push until the tip of the needle pokes through.


Step 4: Once again, rock the needle 90 degrees so it is nearly parallel with the quilt and push through back to the top. Use your thumb to push the quilt top down around the needle as you poke through.


Step 5: If you are comfortable, continue rocking 1 or 2 more times and then pull the thread through after ending with the needle poking through the top. Your row of stitches will be all set. 


Repeat over and over, for what feels like an eternity, until you have completed your quilt!

Happy quilting!